Home · Windows 10 · Narrative Text · Other

HOW TO ENABLE THE CLASSIC CALENDAR IN WINDOWS 10

https://rioberbagibersama.blogspot.co.id/2016/07/how-to-enable-classic-calendar-in-windows.html
Classic clock style and Modern clock style

HOW TO ENABLE THE CLASSIC CALENDAR IN WINDOWS 10

            Hello guys, here I’m so busy to make sure my duties will have finished. Fortunately, I still have spare time to make this article for you guys. OK. Have you ever thought how slow the modern clock/calendar in Windows 10 when it’s opened?  I always feel like that. Maybe some of you feel so. The modern look of the calendar is great indeed(right picture), but it takes longer to show the date than the old one like the capture above(left picture). The old calendar doesn’t need longer time to show up and more responsive, so in our tutorial today, I want to share with you the way to enable the old calendar in Windows 10. Let’s get started.

You may also like this : How to Shutdown your PC with 1x click

Open up the Registry Editor by pressing Win Key + R, then type “regedit” and enter.


Then you have to look up HKEY_LOCAL_MACHINE > SOFTWARE > Microsoft > Windows > CurrentVersion > ImmersiveShell


At the right window, you have to right-click at the blank space, and choose New > DWORD (32-bit) Value, then at the New Value #1, you rename it to be “UseWin32TrayClockExperience


Double click on the string and change the value from “0” to “1”. 0 is used for disabling the string and 1 is used for enabling the string.


Thanks


Related Posts:

HOW TO DISABLE WINDOWS UPDATE ON WINDOWS 10

HOW TO DISABLE WINDOWS UPDATE ON WINDOWS 10


HOW TO DISABLE WINDOWS UPDATE ON WINDOWS 10


            Hello guys, now I’m so excited to post this article. I don’t know why, maybe my brain needs scanning due to the malware attacks. Hahahaaa..

Guys, have you ever been angry because Windows Update ‘eats’ too much your internet quota. On the other hand you don’t do anything. That’s happened because Windows Update runs automatically and download any update which is shipped by Microsoft. Have you thought “How can I disable it?” ?.

Today, I want to share with you the way to disable Windows Update temporarily or permanently, so you can save your internet quota and keep calm when you’re operating your notebook/PC.

Method 1 : Disabling Windows Update Service

Firstly, press Win Key + R and type this “services.msc


Here’s the window of all services in Windows.


Then, you have to look up Windows Update at the bottom of all services.


Open the Windows Update service, then switch “Automatic” to “Manual” or “Disabled”.


NB: MANUAL means that you will manually download updates through Windows Update. The updates will not be downloaded until you have checked for updates manually. DISABLED means that the updates are not able to be downloaded and you will not get any newest updates until you switch it to “automatic” or “manual”.

Then, click on “Apply” and “OK”. You need to restart your notebook/PC so it will run effectively.

Method 2 : Disabling Windows Update through Group Policy
This step will only be applied in Windows version which allows you to access Local Group Policy. At the point, you have to run Windows Professional version.

First, press Win Key + R, then type this “gpedit.msc


There are two menu those are “Computer Configuration” and “User Configuration”. In this tutorial you have to choose Computer Configuration > Administrative Templates > Windows Components > Windows Update.


At the right windows, you have to choose “Configure Automatic Update”. Then, open it and switch “Not Configured” to ”Disabled” (if you don’t want to use Windows Update anymore) or “Enabled”(if you want to adjust the Windows Update to notify you before downloading updates).


If you choose “Enabled“, at Configure automatic updating” below, you can switch “3 – Auto download and notify for install” to “2 – Notify for download and notify for install”. You can also set the time for updates to install. Then, just click on “Apply” and “OK”.


For now, those are the easiest way to disable Windows Update. Those also work for Windows 7, and Windows 8/8.1. Actually, it can be disabled by using PowerShell, Command Prompt and Registry Editor. But, I think they are quite hard to apply.


Thanks


Related Posts:

HOW TO SHUTDOWN YOUR PC WITH 1x CLICK


HOW TO SHUTDOWN YOUR PC WITH 1x CLICK

Hello guys.. Welcome back with me. Here, I want to tell you that  I fell down when I was coming back home from my school. For your information, I’m used to coming to school in order to post my article because I don’t have internet connection in my house. So, I spend most of my time in my school. Since I got that accident, I’m not able to post anything. But, I’m still creating article for you guys.
Guys, have you ever felt that shutting down your PC is so hectic ? Today, I want to share with you how to shutdown your PC with one click, so you just click it on your desktop, and your PC will be automatically shutdown. Are you curious to know it? Let’s get started.

You may also like this : HOW TO CHANGE YOUR PROCESSOR NAME – IT’S JUST FOR FUN

Right-click on your desktop and choose New > Shortcut


Type this at the box “ shutdown.exe –s –t 00 “. If It’s done, you just click on “Next


NB : If you want to delay your shutdown process, you can change the value of “00”. The value depends on your desire, just like 60 secs or else ( the value must be in second ).
NB 2 : You can also create the other shortcuts, just like Hibernate, Restart, Sleep and Lock your PC. Here are the commands :

Hibernate : rundll32.exe PowrProf.dll,SetSuspendState
Sleep : I haven't known it yet
Restart : shutdown.exe –r –s –t 00
Shutdown : shutdown.exe –s –t 00
Lock your PC : rundll32.exe User32.dll,LockWorkStation

In this step, you can rename it, but if you don’t want to rename it, you can ignore this step and click on “Finish”. But, It’s highly recommended to rename it, because the default name will be the same. Both shutdown and restart shortcut will be the same and the other ones will be the same.


If you want to change its icon, you can change it by right-clicking on your shortcut, then choose Properties, then choose “Change Icon…”. If there's a dialog, just click on "OK". Then, you can look for an icon. If you can’t see icon you prefer, you can look for the other icons in imageres.dll. It can be accessed by clicking on “Browse”. Then, search for This PC > Local Disk C > Windows > System32. After that, you have to type “imageres.dll. Then, click on “OK”. Here you can look for other icons instead.


Shell32.dll


Imageres.dll


You may also like this : HOW TO CLEAN INSTALL WINDOWS 10 USING DVD   


Thanks


Related Posts:

HOW TO CHANGE YOUR PROCESSOR NAME – It’s just for fun

HOW TO CHANGE YOUR PROCESSOR NAME


How to Change your Processor Name – It’s just for fun


Hello guys, I’m so starving and worn out at the same time. I need some food here, do you have any?  Maybe one of you are sincerely to give me some. Hahahaaa… I just teasing you. OK, today I want to share with you about changing your Processor name. Have you ever felt so sad because your PC’s specification is not good or high especially your PC’s processor? I will tell you how to change your processor name, so you don’t need to be sad because of it. How can we do it? Yes. It’s possible. We will edit the registry in your Windows. But, it’s just for fun only, don’t you have high expectation just the way you want it. Hahahaaa..

You may also like this : How to Enable Bash Ubuntu on Windows 10

OK guys, Let’s get started.

First, open up Registry Editor by pressing Win Key + R, then you type “regedit”


Then, you have to choose HKEY_LOCAL_MACHINE > HARDWARE > DESCRIPTION > System > CentralProcessor > 0, then at the right window, we look up the string of which name is ProcessorNameString.


Then, click on that string and you can change the name of your processor as like as you want. After that, you can click on “Next”.


You’re all set. Now, you can check your processor name by right-clicking on the Start button, and choose “System”, and you can see the different guys. Don’t expect too high, It’s just a name. Now, you can deceive your friends. Hahahaaa…


You may also like this : How to Remove Files in Recycle Bin with one click


Thanks


Related Posts:

HOW TO CLEAN INSTALL WINDOWS 10 USING DVD

HOW TO CLEAN INSTALL WINDOWS 10 USING DVD


HOW TO CLEAN INSTALL WINDOWS 10 USING DVD

Ohooww.. Welcome back guys!!! Have you ever experienced with a problem just like BSoD, malware attack, or bugs which drive you mad ? There are some ways to fix it, you can restore your system by using System Restore to go back before the problem occurred, and using system image. But, if you want to have your PC fresher, you can clean install your PC. I prefer to do this if I get any problem which probably can’t be fixed well to use System Restore feature or System Image.

You may also like this : How to Fix Problem by Using System Restore on Windows 10

OK. Today I want to tell you how to clean install your PC. Let’s get started guyss.

First, you have to have an ISO file of Windows 10. You can download it in trusted web, just like Microsoft web, Tech Bench, or else. I hope the speed of you internet connection is stable and fast, because the size of the ISO is about 3 GB for x64 based and 2 GB for x86 based. If you have had it, you can skip this step.

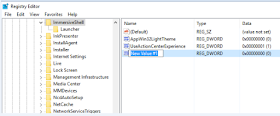
NB : If you have 2 GB of RAM installed in your PC, I suggest you to choose x86 based. But, It depends on your processor, if your processor supports x64, you don’t need to be afraid to use x64 or x86. For making sure whether your processor supports for x64 based, you can check it by using “Securable” app. It’s a portable app, you don’t need to install to your PC, just run it.

Then, you have to create a DVD bootable. Actually, the bootable is also able to created by using Flash Drive. If you don’t know how to do it, you can search it to Google Search. It’s a piece of cake. You can use PowerISO, UltraISO, CDBurnerXP or Daemon tools app. All of them are good to use and user-friendly. In this step, I assume you have created it.

You have to boot your PC to BIOS. We will change thr first boot of your PC from Hard drive to DVD. You can access it by pressing a key on your keyboard. For your information, each of the notebook’s vendor has its own key to access it. For example, my notebook is AS*S, I can get access to BIOS by pressing “Delete” button. You can search it by yourself. I assume you can access it. In this step, you have to navigate to Boot tab, and adjust the first boot to DVD and the second boot to your Harddrive. Then, you can save changes and exit.


If It’s been shown “Press any key to boot from CD or DVD”, you can press any key of your keyboard. I’m used to pressing “Enter” button.


In this step, you don’t need to change anything, just click on “Next” and then, click on “Install Now


If you have a product key, you can type it to the box, if not, you just click on “I don’t have a product key” and input it later.


You have to choose whether you want to install Windows 10 Pro or Windows 10 Home Edition. Then, click on “Next”. Uppsss.. I want to tell you that the version of ISO file we use in this tutorial is Multiple Edition.

What is Multiple Edition?

Multiple Edition of ISO file allows you to install whether you want to install Pro or Home Edition. Both of them are available to install. But, you can’t use both of them, you can only use one of them either Pro or Home Edition. The advantage for us to use Multiple Edition is we don’t need to download both of that versions. We just download it and get two editions in one ISO file and you can save your Harddrive space. The Multiple Edition is not “preying” your harddrive too much than downloading two ISOs one by one.


Check on “I accept the license terms” and click on “Next”


In this step, you have to choose “Custom: Install Windows Only (advanced)


You have to figure this out well. Put your pointer to the partition of your previous Windows installed of which type is “Primary”. It's necessary to memorize each partition in order to get away from loss existing data. Then, click on “Format” and click on “Next“ to install your Windows 10.


Your Windows 10 will be being installed. Wait for it about 25-30 mins. If  your Windows 10 installation process has completed, your PC will be restarting for a few times. Don’t worry, your PC is not in trouble. It’s part of this installation. Calm down.


After restarting, your PC will be prepared so It’ll get ready to use. But, It takes ages(maybe) Hahahahaaa…..


If you’re in network area, just like Wi-Fi, Ethernet, etc, you can connect your PC to the network connection ( If that is needed and required ).


You will find this step. just click on “Use express settings” or click on “Costumize settings”  to set up your PC manually, then you have to wait for it again. It’ll download updates for your Windows 10 and making it get ready to use. (Calm down guyss, It doesn’t take ages, just smile…).


You may also like this : How to Change Default Boot on Windows

In this step, you just choose “I own it” and click on “Next”. You have to wait for it again guys..


After waiting for a while, you can find this. If you want to use Microsoft services or features just like OneDrive, Cortana, Store or XBOX, you have to login using Microsoft Account (It’s optional), if you want to do it later, you can click on “Skip this step” at the left-buttom corner. If you have had a Microsoft Account, you can input it, and click on “Sign in”. In our tutorial, I choose “Skip this step”.


In this step, you can create an local account for your PC including the password. You can also switch your local account to Microsoft account on Settings > Privacy. Password for your local account is optional. Then, click on “Next”. After this, you have to wait for it again about 5 mins. Hahahaaa… Don’t worry guys, It’s the last step. Calm down.


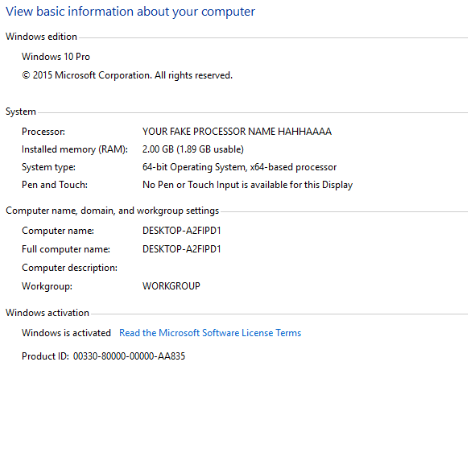
You’re all set. This is your desktop.


You may also like this : How to Dual Boot Windows 7 with Windows 10 


Thanks


Related Posts: